If you are a beginner to Google AdSense and looking for a definitive guide about adding the Google AdSense code to the WordPress website, then this guide is for you. In this post, we will share two easy methods that can allow you to add the Google AdSense verification code to your WordPress website easily without having any coding or technical knowledge.
Before explaining the methods let us know about what Google AdSense verification is.
What Is Google AdSense Verification Code?
Google AdSense verification code is a code snippet <script></script> that a website owner needs to add to their website when first applying their website/blog for Google AdSense approval. The code/script goes into the head section <header></header> of your website.
There are two easy yet famous methods to add an AdSense verification code to a WordPress website. We will discuss how to add the Google AdSense verification code to the custom-coded website in another detailed guide.
Importance Of Google AdSense Verification Code
You might be thinking why is it necessary to add the verification code?
I will give you the answer.
If you focus on the name of this script, it is called Google AdSense verification code. That means it is a piece of code that will verify the ownership of the website. To add the code you need admin login access to the blog and you can only access it if you are the owner or maybe you are working for your client. But in both cases, you need admin access to place the code.
Or you can also say that it is a security layer to prove the ownership.
Methods To Add Google AdSense Verification Code To WordPress
- Manually Add The Code Using the WordPress Theme Editor
- Add Google AdSense Verification Code Using Plugin
#1- Manually Add The Code Using the WordPress Theme Editor
This is the first method in which you can add the AdSense verification code to a WordPress website using the theme editor. This method is not difficult but only requires basic coding knowledge so that you can place the code in the right file to avoid any kind of damage to your website.
But do not worry we will explain all the steps.
Steps To Add AdSense Verification Code Using The Theme Editor
Follow all the steps.
Step 1
Login to your Google AdSense account and head over to “Sites” in the left-hand sidebar menu. (Here I am assuming that you already have a Google AdSense account).
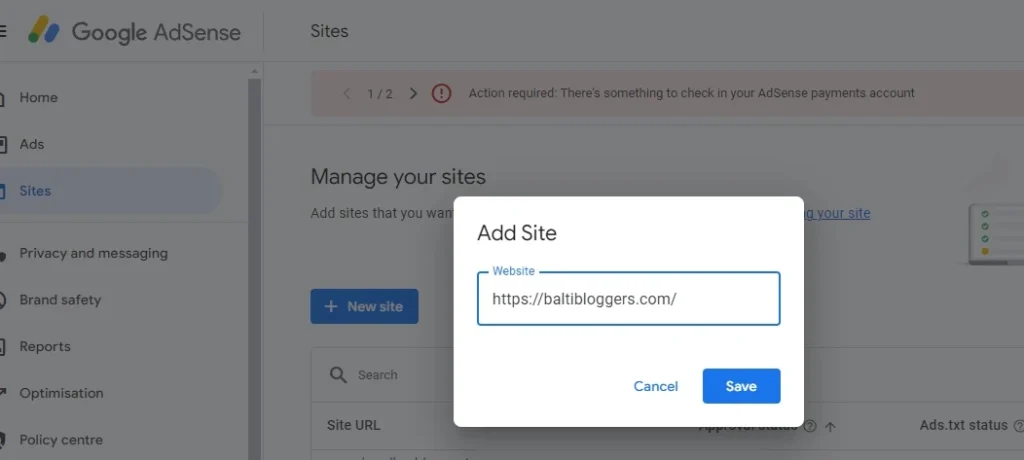
Step 2
Click on the “Save” button and it will take you to the next step where you can get the code.
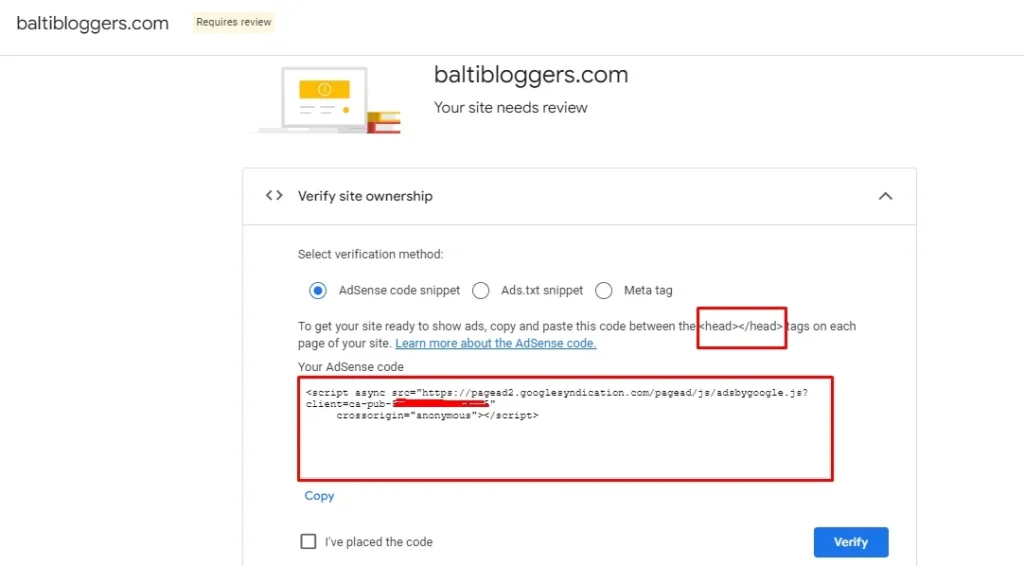
You can see the Google AdSense verification code in the above image. All you need to do is copy the code to your WordPress website paste it and click on the “Verify” button. You can see the steps in the below images.
Step 3
Now head over to your website dashboard and hover on “Appearance” and then the theme file editor.

Click on the “Theme File Editor”. It will open all the WordPress files. On the left side, you can the list of the files. Find header.php and open it.

Step 4
Paste the code that you copied from Google AdSense and paste it above the closing head </head> tag. And click on “Update”.
Step 5
It is not completed here.
Now you need to go to your Google AdSense account again and click on the “Verify” button. Google AdSense will check and try to find if the code is actually pasted in the <head></head> section of your website or not. If they find it you can see the notification and if not also you can see the notification.
After clicking the verify button your website will send in a review for Google AdSense approval.
This is how you can add the Google AdSense verification code to your WordPress website manually.
Note: Do not edit and make changes in any other file if you do not have coding knowledge. Otherwise, it will end up breaking your website.
#2- Add Google AdSense Verification Code Using Plugin
The second method to add the code is using WordPress Plugin. There are many Plugins available both free and paid. We will share the free method which can do the job easily and effectively.
Steps To Add AdSense Verification Code Using WordPress Plugin
The first few steps are again the same that you followed above. You need to add your website to Google AdSense and get the code from there. But in this method instead of adding the code into the header of the blog, we will use Plugins that will automatically add the code in the head section <head></head> of your blog.
Here are the steps.
Step 1
Go to the dashboard of your WordPress website and click on “Plugins” and then click on “Add New Plugin”.
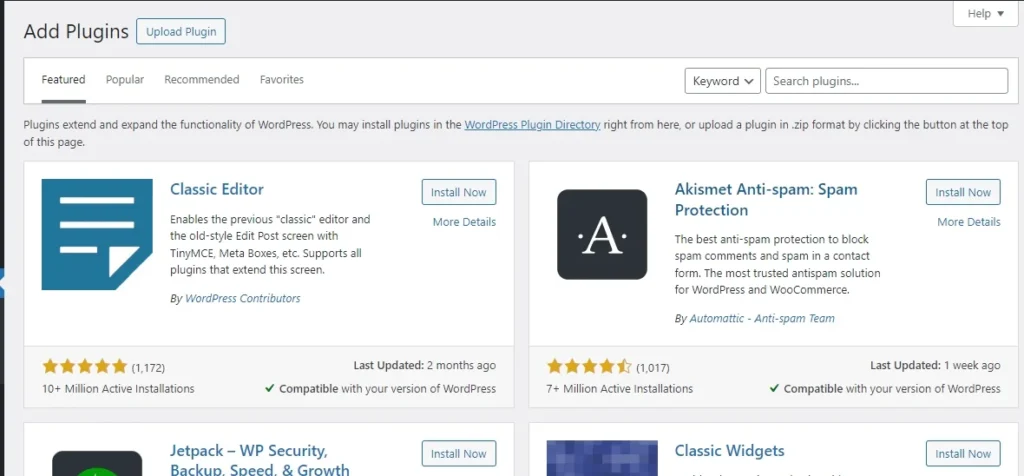
In the search box showing in the top right corner type “Ad Inserter – Ad Manager & AdSense Ads”. This is a very famous Plugin with 300,000+ Active Installations.
Step 2
Click on “Install” and “Activate”. Once you are done with the installation process of the Plugin, go to “Settings” on the left-hand side and click on “Ad Inseter”. You will see a page like this.
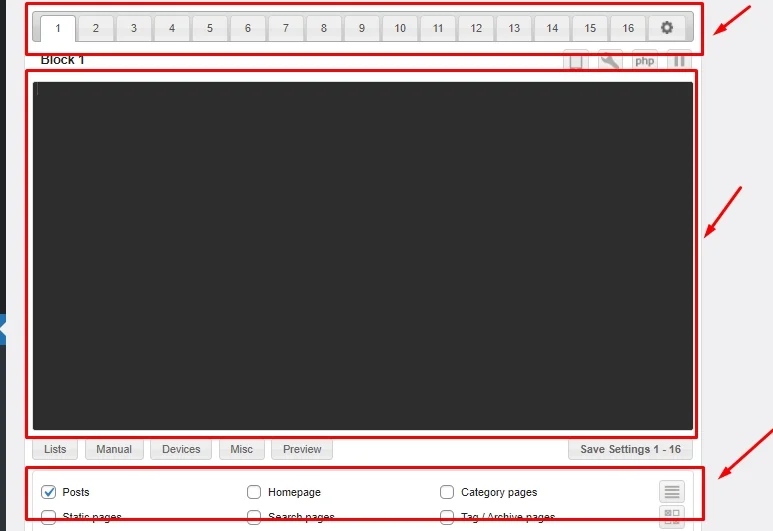
Focus on the highlighted areas.
You can see numbers from 1 to 16 at the top of the text box. These are fields where you can add other Google AdSense codes if you generate an ad code later. All you have to do is generate an ad code in Google AdSense, copy that code, paste it here, and save it.
Once you paste the code you can choose the place where you want to show the ads. It can be “Page” or “Post” that you can choose from the last highlighted area in the above image.
You can choose from:
Conclusion
These are the two easy methods to add the Google AdSense verification code to a WordPress website. The method is changed for other CMS systems and custom-coded websites. You need to follow only one method. You can not add the code using both methods which we discussed here.
FAQs About Google AdSense Verification Code
-
What is the Google AdSense verification code?
As we discussed before, the Google AdSense verification code is a piece of code that publishers need to add in the head section of their blog when they are applying for Google AdSense to show that they are the real owners of the blog.
-
Why do I need to add the AdSense verification code to my website?
Adding the code is important to show that you own the blog where you are adding the code of Google AdSense.
-
Where do I find my Google AdSense verification code?
You can find the code in your Google AdSense account. The code can be shown when you enter your domain name in the “Add Site” in AdSense.
-
Can I use Google Tag Manager to add the AdSense verification code?
Yes, you can use Google Tag Manager to manage any code. But I recommend you to use it if you are an expert in this only. Otherwise, the above methods are easy and beginner-friendly.
-
How long does it take for Google to verify my site?
Once you add the code using any of the above methods Google AdSense will verify your site instantly.
-
What should I do if I accidentally remove the verification code?
It’s not a big deal if you accidentally remove the code from your website. You can generate another one and add it again.
-
Can I use multiple verification codes on a single site?
You can use but it is not a recommended method. Try to use a single code on a single website. Another reason is that it is a JavaScript code and it will affect the loading speed of your website.